How to View Email Headers in Gmail: A Step-by-Step Guide
Email headers contain vital information about the path an email has taken, including its origin, the servers it passed through, and more. This information can be crucial for troubleshooting, identifying spam, or verifying the authenticity of an email. In Gmail, accessing these details is straightforward but not immediately apparent to every user. This guide will walk you through the steps to view email headers in Gmail, providing insights into the technical journey of your emails.
Step 1: Open Gmail
Begin by navigating to the Gmail website in your web browser. Log in with your credentials if you're not already signed in to access your inbox.
Step 2: Select the Email
Browse through your inbox and click on the email whose headers you want to examine. This action will open the email, allowing you to view its content.
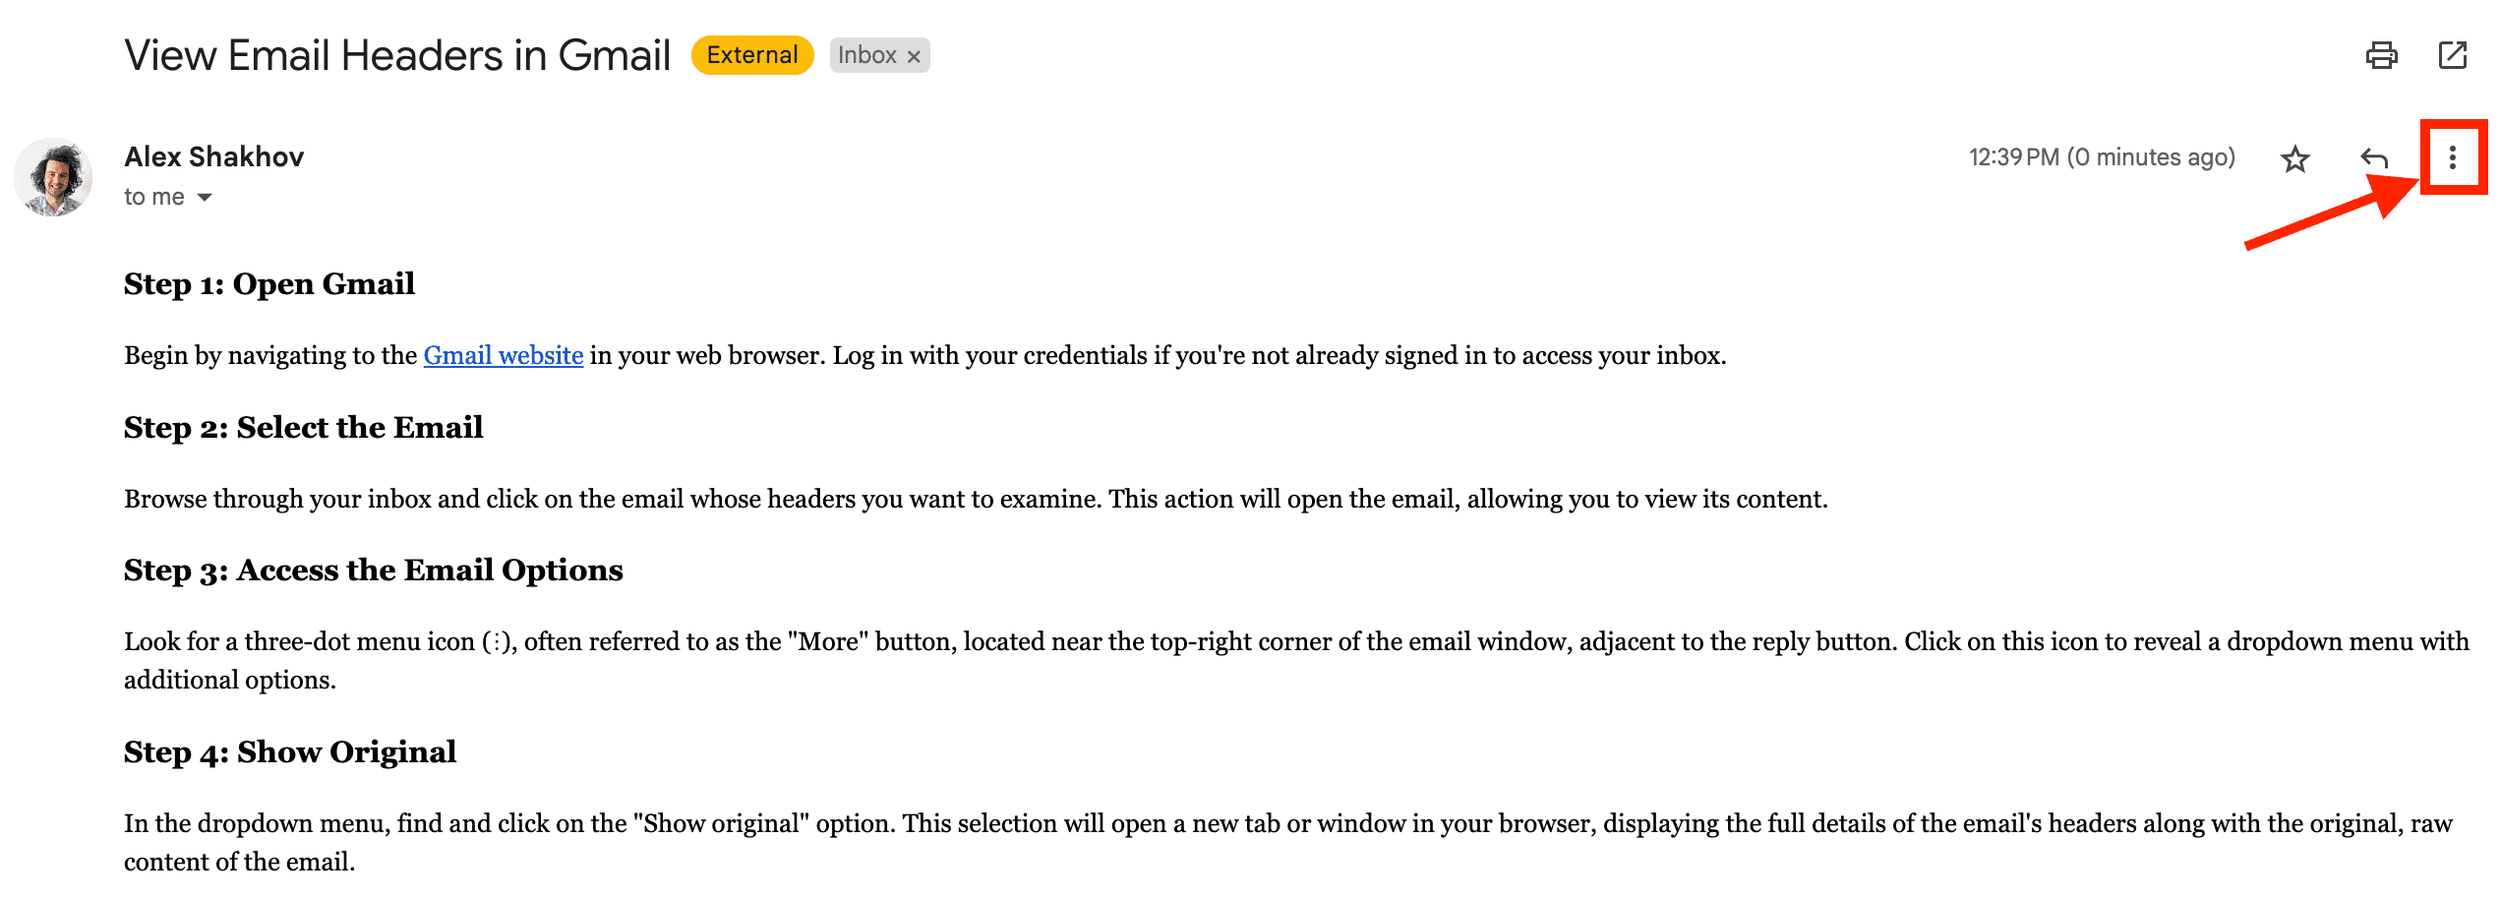
Step 3: Access the Email Options
Look for a three-dot menu icon (⋮), often referred to as the "More" button, located near the top-right corner of the email window, adjacent to the reply button. Click on this icon to reveal a dropdown menu with additional options.
Step 4: Show Original
In the dropdown menu, find and click on the "Show original" option. This selection will open a new tab or window in your browser, displaying the full details of the email's headers along with the original, raw content of the email.
Step 5: Analyze the Header Information
The new page will present the email headers at the top, followed by the body of the email. The header section contains various fields such as "From," "To," "Subject," and several others that track the email's path across the internet. Here are a few key components you might see:
From: The email address of the sender.
To: The recipient's email address(es).
Subject: The subject line of the email.
Date: The date and time the email was sent.
Received: A series of entries, each representing a server that the email passed through on its way to the recipient.
Step 6: Use the Information
With the header information displayed, you can now use it as needed. For instance, you can check the "Received" lines to trace the email's path, look at the "Return-Path" to verify the sender's email address, or examine the "SPF," "DKIM," and "DMARC" entries to understand the email's authentication status.
Tips for Analyzing Email Headers
Look for Anomalies: Discrepancies in the "From" field and the "Return-Path" can sometimes indicate phishing or spoofing attempts.
Trace the Path: The "Received" lines can be read from bottom to top to trace the email's journey from the sender to your inbox.
Authentication Results: The "SPF," "DKIM," and "DMARC" fields provide insights into whether the email passed essential security checks, which can help determine its legitimacy.
Conclusion
Viewing email headers in Gmail is a valuable skill that can help you understand more about the emails you receive, from their origin to the path they took to reach you. Whether you're troubleshooting, curious about the technical aspects of email, or concerned about security, these steps will enable you to access a wealth of information that lies beneath the surface of every email you receive.
Should you require help with analyzing email headers to better understand your email backend configuration, drop us an email at info@theshcompany.com and we'll respond to you within 24 hours.


